
The Fine Print - Nice and Bold!
What you need to know before you (or we) start to avoid nasty surprises later.
Click on the subject to learn how and why we do what we do (or what you need to do to create a successful outcome).
Note: alternating use of the words glass bricks and glass blocks used here to cover both search terms for Mr Google and his friends!
Our Best Practice Methods
Laminated Multi-Layer Fire Rated Glass Bricks
Technical Details
Solar Heat Gain Coefficient (SHGC)
(this is a gathering of data averaged to cover a range of brands and is offered as a convenient guide only. We accept no responsibility for the accuracy of this information (for critical technical data and measurements we recommend obtaining certified data from the individual manufacturers).
Our Best Practice Methods

Frame Installation
If you install window frames all the time, please don’t assume that you know exactly what is needed. Please read this! For Fire Frames read this and next section as well. You need to think of this as a heavy brick wall sitting inside a light aluminium frame, not as a standard light weight window. Fixings for the frame need to be maximum 600mm centres and most importantly, the sill of the frame needs to be packed and supported really well. Think of a brick wall with a steel lintel over an opening that has to carry all of the weight of the bricks above it and how sturdy this needs to be. Now imagine the sill of the glass brick frame having to do the same thing but is really flimsy and has no support to do it on its own. The sill not only needs support to stop the middle from sagging but also needs support to stop the frame flexing and bowing the glass brick panel as it is being laid (think of a brick veneer construction, the frame may be packed and supported really well on the stud framing, but if the frame is spanning the wall cavity between the stud wall and the brick wall and only supported on the stud wall side, the weight of the glass brick panel will cause the unsupported side to flex and sag down causing the glass bricks to bow outward ever increasingly as the panel gets higher and heavier. Support must be provided to prevent this flex from happening, even if it is temporary until the glass block panel has set and is rigid. After it is set any temporary support can safely be removed.
This same flexing of the frame can happen if packed unevenly along the sides of the frame - the installer puts his spirit level/straight edge on the inside of the frame fixed to the stud wall, sees that all is level, plumb and straight and leaves it there without checking the outside edges where the frame is not attached to anything yet (ie: the outer brick skin hasn’t been laid up against the frame yet) and doesn’t notice that too much tension in the fixings or badly placed packers has caused the frame to bow on the outside face. This will be noticeable with the joint lines of the glass bricks on the outside.

Fire Frame Installation
(Everything you read in the previous section - Frame Installation, is applicable as well as what is written here, please read both - as annoying as that may seem, it could make a world of difference to the success of getting Fire Certification!) There are some extra things to consider with preparing for and installing glass brick frames for fire rated panels.
Firstly, the frame itself is not considered to be fire rated, it is more a type of permanent form work housing the mortar and expansion fire wool. The frame will melt in a fire being aluminium and having a relatively low melting point and the panel will still remain in place keeping a fire at bay due to the specific way it is installed.
There is a complex system of steel reinforcement running through the mortar joints between the glass blocks that actually extend out through pre-drilled holes in the glass block frame and into the surrounding fire rated building structure. It is this reinforcing system that will hold the panel in place when the frame is compromised but only if the following criteria is met:
There must be a solid backing behind the frame for these reinforcing rods to fix into (you cannot simply have the aluminium frame spanning a wall cavity like a standard window as these rods must be fixed into something not sticking into the air!) There also needs to be a physical barrier for smoke and flames once the edges of the frame have melted.
There must be a relatively small gap 10mm maximum between the frame and the structure that these reinforcing rods will fix into (These rods are only 5-6mm in diameter and will be very strong and able to withstand pressure created by extreme heat without movement but only if the gaps are small - think of holding a 6mm thick steel rod that is 400mm long in your hands with your grip far apart and try to bend it… easy right? Now think of trying to bend a 100mm long rod when your hands are right next to each other…. it’s a lot harder to bend!).
The pre-drilled holes in the glass brick fire frame MUST NOT be used for fixing through, they are located exactly where the reinforcing rods must penetrate the frame though the aligning mortar joints and cannot be moved. Make your own fixing holes wherever else you need to.
The gaps between the glass brick fire frame and the building structure must be sealed with fire rated caulking material.

Defects In Glass Bricks
Glass bricks are made from glass cast into a mould in two half pieces which are then sealed together as a hollow, whole glass block. While the quality of the glass brick manufacturing is quite high, it isn’t perfect. There are small defects that often present in the glass that a keen eye will pick up. This is unfortunately unavoidable. Some of the manufacturing defects are small bubbles in the glass, occasional small lines looking like cracks but not going anywhere, small ripple lines on the surface where the molten glass was poured into the mould, small impurities in the glass, slightly dirty marks inside the brick itself, paint runs or splashes on the face of the glass brick.
Some of the transit defects (created during shipping or packing) are small scratches or chips, sometimes even entirely broken.
It is important to note that no glass bricks are made in Australia, they are all imported and it is a small market in Australia compared to Europe, Asia and North America. It is sad to say that often we (that is all Australian importers of glass bricks not just us) get sent what may be considered less than top quality products simply because it is impossible to send it back and we aren’t a big enough market to demand better!
With this information in mind, this is how we handle defects, small manufacturing defects like bubbles etc we try to identify and install them away from eye level to make them as undetectable as possible. If any defects are blatantly obvious, we reject them but we can’t reject them all, there would be too much wastage.
Defects such as chips and scratches are generally rejected outright unless they are very small and will never be seen in say, the outside face of a second storey window a long way away from eyesight. Sand blasting the outside face of glass bricks tends to highlight any defects much more so you need to be aware of this as they will show up small marks and we do have to use them. (See also section - Sand Blasted Glass Bricks)

Which Is The Face Side Of The Panel?
Generally speaking, the face side of the wall would be the side that is seen the most, often the inside wall of a house or office where people generally spend the most time looking at the glass bricks.
Why does this matter?
The thing about glass bricks is that they are two halves of glass that have been welded together to form one unit. The issue is that this is not an exact science and there is variation as to how the glass brick ends up once welded. Sometimes they are not square from front to back (see above picture showing back face tilting - image exaggerates this to make it a more obvious example) and sometimes they could be a millimetre or two thicker or thinner.
INSTALLATIONS IN MORTAR: To create the best finish possible for both sides, we clamp a rigid straight edge (think of this as a string line that also supports the glass bricks as they are being laid) to the back of the frame at the height of each course of glass bricks to be laid. This allows us to keep the back side of the wall nice and straight so any variance in glass brick thickness is not seen on this side (inside this is not very obvious due to the rounded edges of the glass brick). We sight the edges of the glass bricks on the inside and adjust as necessary to keep the joint lines very straight inside where your eyes will look over it the most. Anything not square creating tapering joints or thick and thin joints will show up more outside where it is not as important. This method of installation allows us to give you a very nice balance of quality on both sides of the glass block wall.
IMPORTANT NOTE: the side we lay the glass blocks from will be the face side, if there is a physical barrier preventing us from laying the bricks from one side, say a staircase, a floor or wall that stops behind a glass brick panel that continues past then this will be the back of the wall. This is not a problem, the differences are very small and only the most scrutinous of gazes will detect the difference (in fact, if we didn’t mention it here, most would never notice it at all).
INSTALLATIONS IN SILICONE: Due to the glass bricks sitting on thin plastic PVC or aluminium tracks with no way of adjustment, these variations in the glass blocks just are what they are. We do the best we can to make both sides of the wall look as good as we can but we are limited in what we can do, this is why we strongly recommend clear translucent silicone as the colour to fill the joints between glass bricks as this blends nicely into the colour of the glass and puts the focus on the glass bricks themselves, not the joints that separate them. (see also section -Why We Use Clear And Not Coloured Silicone)

Which Way Does The Pattern Get Laid?
There is no requirement for a pattern to get laid a particular way and if you have a preference, please let us know and we will give you what you want. As a default, this is what we do in the absence of other instructions or we are onsite ready to install and unable to contact the decision-maker:
Wave pattern - gets laid randomly as it looks the same as you look through it no matter how they get laid.
Sand Blasted Wave and Janus Icy patterns - the pattern on one side is more pronounced now so we lay them all with the same orientation with the obscure face on the outside creating the most privacy. With Sand blasting, the surface is pitted so easier to clean on the outside face with a hose.
Janus Storty pattern - Wavy side inside oriented the same way with distorted lines on the outside face.
Crossrib and Xenon (Light Diffusing) patterns - with horizontal lines one side and vertical lines the other - the eye tends to be drawn firstly to horizontal lines before vertical lines. With this in mind, we put the horizontal lines on the inside face as this is where we put the most focus on alignment.
Ocean View pattern - will be laid with wavy pattern horizontal inside looking like a rolling sea rather than breaking surf waves if laid vertically.
Digona, Toba, Stella, Omega, Optical patterns etc -Directional patterns will be laid oriented the same way unless instructed otherwise.
La Rochere Nuagee Wave pattern - has a vertical aspect one side and horizontal the other, these will all be laid oriented the same way.
Rotational Symmetry patterns - any patterns that look the same regardless of which way they are laid, sideways, upside-down etc don’t apply here unless they were sand blasted one side in which case they would be laid with the sand blasted face on the outside.

Sand Blasted Glass Bricks
(This section should be read in conjunction with the section on Defects In Glass Bricks.)
Any brick can be sand blasted which pits the surface of the glass giving it a very private, frosted appearance.
This is quite a nice look but it does create some challenges. The pitted face is much harder to keep clean than smooth glass, we recommend not having this face inside and not in a shower unless you like scrubbing! If is on the outside, you can take to it with a broom, soapy water and a hose.
The sand blasted face is a visual barrier, from outside, the glass brick is now two-dimensional in appearance as you can’t see the depth of the glass brick, on the inside you still see the depth which is lovely in appearance but as you can’t see any further than this, your eye is more readily drawn to small defects in the glass bricks that we not noticeable before as your attention is drawn more to the view that is beyond the the glass brick panel with it’s distorted shapes and colours. With sand blasted bricks you also lose colours in your view as all you see is filtered white light.
We try to discourage sand blasting as we have to compromise quality and use these bricks that present with small defects showing due to it not being economically viable to reject them all.
Taking into account all of what is written here about how the defects are highlighted with the sand blasted face on the outside of the glass block panel, the opposite is true if the sand blasted face is on the inside, it hides most defects well, so if this isn’t in a wet area like a shower and doesn’t require concentrated cleaning often, you may well want to use this pattern.

Figure 1 - the back of the wall - (not one of our jobs) more uneven than the front and the brick size difference is highlighted more with the sharp arrises at the bottom instead of the top

Figure 2 - tapered sides creating wedge-shaped perp joints. Photo also shows casting marks on the faces, inherent in open mould casting.
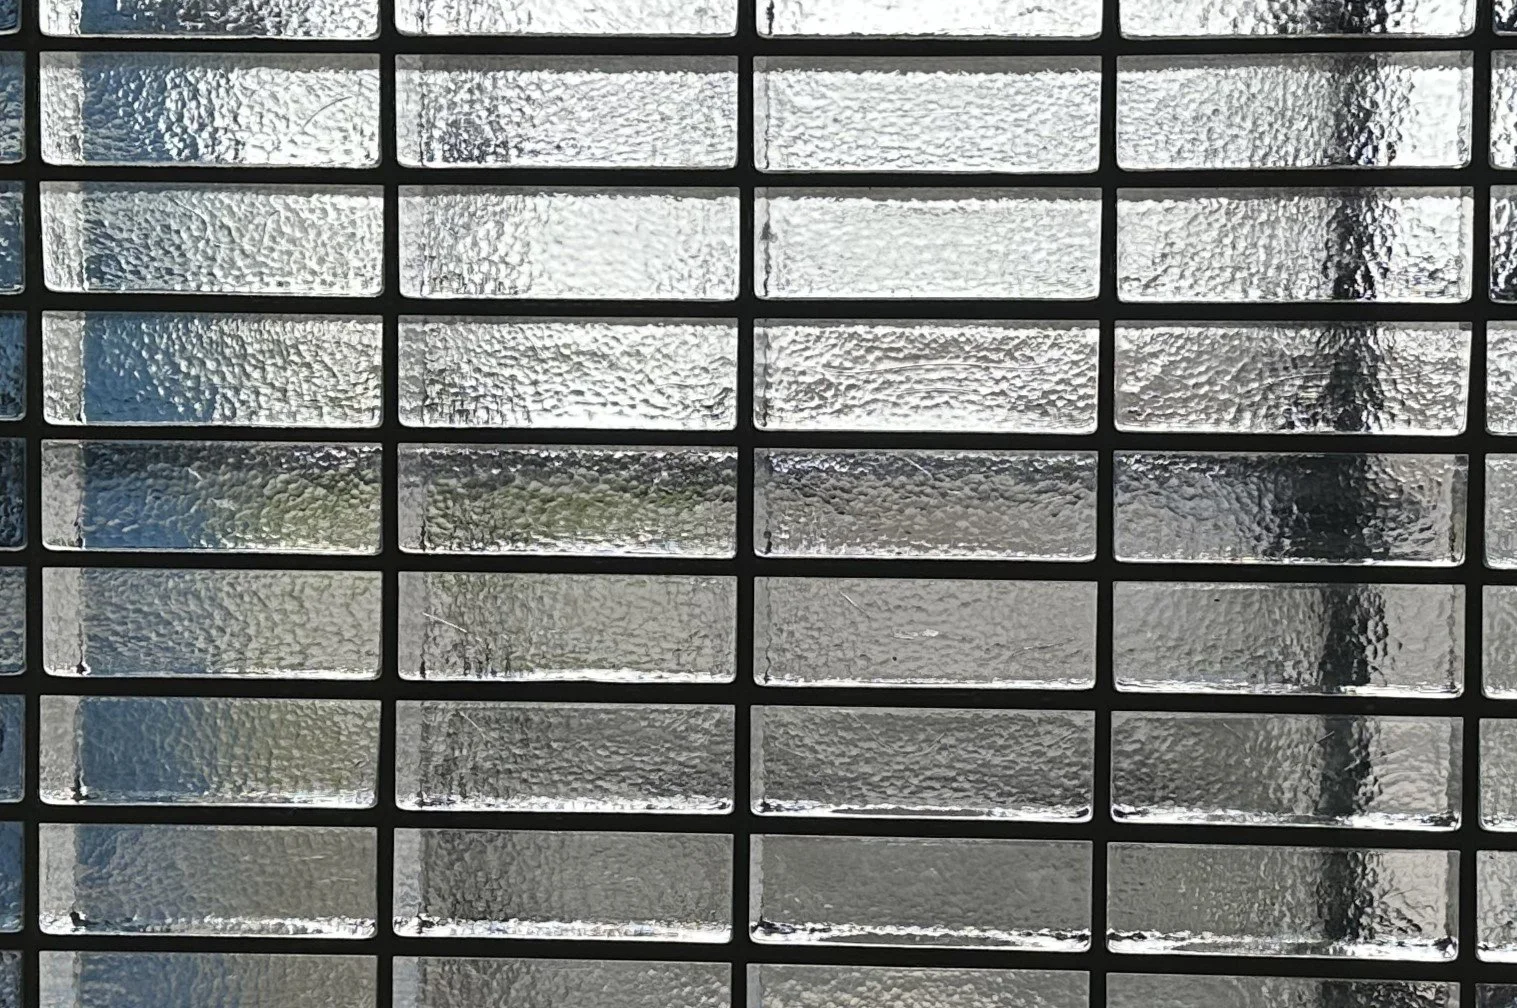
Figure 3 - flat face laid facing up promoting a cleaner line on both sides of wall with the uneven curved arrises laid down, not up
How We Install Solid Glass Bricks
This is very new and exciting!
Solid glass bricks are redefining people’s ideas of glass brick architecture. As with many new concepts, there is a learning curve as to what is generally acceptable and good practice with regard to how they will look, and what will provide the best long-term outcome for wear (essentially, what will be the most effective Fit-For-Purpose way to construct a solid glass brick wall)
CHARACTERISTICS OF SOLID GLASS BRICKS
Firstly, these amazing bricks will always have a rustic quality appeal with lots of bubbles, casting marks and lines etc, not a millimetre perfect quality appeal with flawless glass clarity. If extreme accuracy is your thing, solid glass bricks won’t be.
Solid glass bricks are hand cast into open moulds, the height of each glass brick varies, sometimes as much as 6-8mm! (see figure 7) They differ to classic hollow glass bricks which are much more uniform in size (although still not exact). The most often have casting marks on the faces which is unavoidable and also adds to the rustic appeal of these bricks (see Figure 2)
The glass brick moulds are slightly tapered, (mildly trapezoidal - see Figure 2 also) to allow for the cooling glass mass to be emptied out without getting stuck in the mould. This means that the flattest part of the glass brick (the part of the not-quite-set mass of glass that rested on the flat cooling plate) is also the widest and longest part of the tapered brick with sharper arrises than the top which is lsightly narrower, has curved arrises and a slight indent toward the middle from shrinking as it cools (this indent is known as a frog - it assists with creating a bond with the mortar) and is what most people would consider the top of the brick (See Figure 6 - arris , BTW, means corner or intersecting edges of the brick).
WE LAY THE FLAT FACE UP NOT DOWN… WHY?
To understand this better, we need to quickly explain how normal bricks are laid.
Standard clay bricks have always varied in size, it’s the reason there is a 10mm mortar thick joint and not smaller, primarily to take up the difference in size, open mould solid glass bricks are the same (see figure 7).
Bricks are laid laid with a string line guide to the top edge to create some sort of uniformity to a varying sized product - while the dimensions are different, our eyes are appeased by the straight line created at the top of each course of bricks making them look more acceptable. As this has been the case since - forever, It’s how we are wired to see them. If the top line of the bricks isn’t straight, we instinctively notice that something is wrong.
Due to the straight and sharp arrises on one side of the glass brick, we believe they look best laid as the top edge, giving our eyes that nice straight line they are wanting to see, contrasting with the curved and contoured arrises of the other side, we find that curved edges laid facing down, smooth out the difference in height at the bottom of bricks far better than the sharp arrises highlighting the size difference if laid the other way (see Figure 1).
The other aim is to make the face appear flat which is a challenge when the bricks aren’t square.
This means that often, to create the flat even surface on the face of the wall, the back edges of the bricks (that histrorically aren’t seen, as they are hidden in a wall cavity) will jutt up or down as required to avoid lipping the brick arrises on the face of the wall.
Glass bricks are a single skin wall that is most often a feature wall on both sides.
Bricklayers are familiar with building single thickness wall that are seen on both sides (think suburban brick garage walls). Most clay bricks are designed to have a face side on one face only, so by default, this is the only side that care is taken on, the back of the wall is just treated as that - the back of the wall. So while the joints are finished off properly on both sides, the back is still pretty rough and ready. This is an industry standard and an accepted practice.
Enter solid glass bricks on the scene, add the standard bricklaying practice of a string line on one side of the wall only, and you have your standard rough and ready single skin garage brick wall, great on one side, marginal on the other (just swallow down the feeling of a second quality finish on a wall you paid an absolute premium for and everything will be alright!) see Figure 1.
How we solve this issue.
By clamping a rigid straight edge on the back of the brick course at the top of the brick, we have a guide to keep the backs of the bricks all in line, as well as the string line, keeping the front looking straight (see Figure 4 and Figure 5). This comes at a compromise, we have to sacrifice the flatness of the front face that bricklayers are always striving to achieve, in order to get straight lines both sides. From an aesthetic point of view, this is far more appealing, our eyes seem to be drawn to level lines first, then plumb lines, and then flat vertical planes. If you achieve level lines, the others don’t seem as important as to what looks right.
When you take into account the tapered sides of the glass bricks (on the stretcher (long) faces as well as the header (short) faces, it is almost impossible to achieve that elusive flat plane anyway, so best not to try.
The other reasons we find the flat face laid up is a better option is that the rounded face is often not even (as in, the brick may rock if you place it this way down on a flat surface because the thickness of the brick is uneven, which is the precise reason the 10mm thick mortar joint exists, this is further highlighted when the sharp arrises are laid downward (this is also why we strongly advise against installing these bricks in a silicone system, it is fraught with issues due to varying sizes).
Lastly, laying with the frog down (the indent in the glass) works nicely to give a little stability to the brick, holding it in place with more success than with the flat face down.
To understand this, you need to appreciate that smooth glass is very slippery when in contact with wet mortar, it can be like sliding around on ice (not such an issue with frosted bricks but still a problem) and the frog creates a slight mound of mortar better locating the brick in position.
An interesting side note:
Solid glass bricks reflect light very well and the flat internal surfaces act as mirrors, this may not mean much to you, but when rain is falling outside, as you look down at the lower courses, the mirroring effect gives the illusion that rain is falling up, not down! This is less noticeable when the indented frog is downward as there is more distortion in the reflection.

Figure 4 - Rigid straight edge clamped to back of brick course along with a string line on the front. Creates straight lines on both sides of the wall (see figure 5 for more clarity)

Figure 5 - same as figure 4, but with no glass bricks for clarity of position of straight edge and string line guides

Figure 6 - Curved and uneven arrises and frog on top surface, straighter, sharper arrises on bottom, which is generally wider in length and width than the top surface

Figure 7 - Varying heights of solid glass bricks, note the half brick top left of right hand side panel
Why We Use Clear And Not Coloured Silicone
(Please read in conjunction with the section - Which Is The Face Side Of The Panel? particularly the INSTALLATIONS IN SILICONE: paragraph)
We want to give you the very best finished product possible so that you are very happy with what you end up with. You may even get us back for more work and recommend us to others! With that in mind, please understand that silicone is not an easy medium to work with and although silicone installations look great and are very versatile, they do have some challenges. Sealing up every single joint between every glass brick on both sides of the wall amounts to a lot of silicone that will be seen, add to this that the joints intersect everywhere and that the the edges of the glass blocks are rounded and that glass is transparent, that is a lot of varying surfaces to work with. Anywhere the silicone touches the glass when being applied, is very hard to remove entirely. We highly recommend clear (translucent) silicone because it blends nicely with the glass and doesn’t highlight the joint lines. This means that any little areas where the silicone has touched the glass and been removed is virtually invisible and is very pleasing to the eye. It also means that any irregularities in the joints are nicely disguised.
Conversely, coloured silicone will contrast with the clear glass rather than blend and will highlight any variation in joint sizes, show silicone residue where removed from the glass and stick rather annoyingly to the tiny glass ridge line left from the casting mould where the curved face edge of the glass meets the flat side section (a close up picture of this is on the PDF download).
To summarise, silicone joints looks best when blending with the glass bricks rather than contrasting which is a shame as there could be some nice alternative joint colours in silicone, they just come at a quality sacrifice to the joint finish.

Laminated Multi-Layer Fire Rated Glass Bricks
(Please read in conjunction with the section - Which Is The Face Side Of The Panel?)
With normal glass bricks being made of two halves of glass welded together and these multi-layered glass blocks sticking these together to form thicker bricks, they have a functional use in that they can provide an insulation rating in the Fire Resistance Levels (FRL) that are good for say fire escapes stairs past shared hallways for example. This functionality does come at a cost unfortunately. Consider the alignment issues mentioned in the other section with regards to not being square front to back with two pieces of glass joined together, with double thickness glass blocks there are now four pieces of glass stuck together, with triple thickness - six pieces of glass stuck together! This does degrade the accuracy of alignment from one face to the other, so one side (the inside face or best face will look well aligned but the other can be quite problematic with thick and thin mortar joints. The other compromise is that the silicone sealant used to join these bricks together is translucent, not clear so there is a degradation in the clarity of your view with multiple layers, this also creates the same challenge as sand blasting in that any small defects in those multiple layers are highlighted and at the cost of these bricks, they will be used and not rejected. These particular bricks are extremely expensive and do have a place in our building industry but if they are not essential to the fire performance requirements of your construction, there are much cheaper and far more attractive alternatives by bypassing the insulation rating if not necessary.
Technical Details

What Do Glass Bricks Weigh?
This section covers the weight of individual glass block units, please also see the Structural Support section which covers the combined weight of installed panels. The weight of our standard sized glass bricks being 190x190x80mm with an 8mm nominal wall thickness is approximately 2.4kg.
The bullet resistant security glass bricks 190x190x80mm with a 25mm nominal wall thickness weigh approximately 5.1kg.
Other glass brick sizes have a nominal wall thickness of 8mm and approximately weigh as follows:
190x190x80 - 2.4kg (Classic Size Glass Brick)
190x190x50 - 1.7kg
190x90x80 - 1.5kg
190x190x95 - 2.6kg
190x190x100 - 2.7kg
300x300x100 - 6.9kg
240x240x80 - 3.8kg
240x115x80 - 2.2kg
145x145x80 - 1.5 kg
115x115x80 - 1.0kg
Specially Engineered glass bricks
190x190x80 - 5.1kg (bullet resistant*, +90min fire rated security block)
190x190x160 -10.2kg (double thickness block FRL -/90/60 (90 min flame resistant, 60 min heat transfer resistant))
190x190x100 TF30 La Rochere double thickness 4.0kg
190x190x150 TF60 La Rochere triple thickness 6.0kg
190x190x80 30F Seves single thickness 4.15kg
190x190x160 60F Seves double thickness 8kg
190x190x160 90F Seves double thickness 8.3kg
*Tests have been done where a .22 pistol fired at the face of the glass brick has only penetrated one side giving a high degree of security for person and property.

Compressive Strength
Compressive Strength Qualities:
Greater than 600 PSI or 100kg/cm2
Please Note: The purpose of these figures is for calculating the bearing weight of the glass brick wall's
own structure and not other elements intended to be supported by the glass brick wall as they are deemed not to be a load bearing element.
The bearing surface of an individual glass brick will withstand 15,000kg.
Compressive strength table expressed in Megapascal (MPa) which is the same as Newton/square millimetre (N/mm2)
190x190x80 >9MPa
190x190x50 >13MPa
190x90x80 >13MPa
190x190x95 >9MPa
190x190x100 >9MPa
300x300x100 >10MPa
240x240x80 >9MPa
240x115x80 >15MPa
115x115x80 >15MPa
Specially Engineered glass bricks
190x190x80 >13MPa (bullet resistant*, +90min fire rated security block)
190x190x160 >9MPa (double thickness block)
190x190x100 TF30 La Rochere double thickness >10MPa
190x190x150 TF60 La Rochere triple thickness >10MPa
190x190x80 30F Seves single thickness >9MPa
190x190x160 60F Seves double thickness >9MPa
190x190x160 90F Seves double thickness >13MPa
Further information currently being updated...

Thermal Properties / Insulation Values
Thermal Qualities:
The thermal insulation qualities of our glass bricks is generally equivalent to a brick veneer wall (if shaded) or standard double glazing. The degree of insulation is known as the k-value of the heat transfer [h/m2k]. The k-value of our glass bricks are on average 3.00/m2. The insulating quality is better the lower the value is (The K value is the rate of heat transfer through a square metre of material per change in degree Celsius, from one side to the other.).
- 190x190x80 (U) 3.0 Wm-2K-1
- 190x190x50 (U) 3.1 Wm-2K-1
- 190x90x80 (U) 3.2 Wm-2K-1
- 190x190x100 (U) 3.0 Wm-2K-1
- 300x300x100 (U) 3.0 Wm-2K-1
- 240x240x80 (U) 3.0 Wm-2K-1
- 240x115x80 (U) 3.1 Wm-2K-1
- 115x115x80 (U) 2.8 Wm-2K-1
- 190x190x100 TF30 La Rochere(double thickness)(U) 2.3 Wm-2K-1
- 190x190x150 TF60 La Rochere(triple thickness)(U) 1.7 Wm-2K-1
- 190x190x80 30F Seves single thickness(U) 2.2 Wm-2K-1
- 190x190x160 60F Seves double thickness(U) 2.2 Wm-2K-1
- 190x190x160 90F Seves double thickness(U) 1.5 Wm-2K-1
- 190x190x100 x 2 skins(U) 1.5 Wm-2K-1
Further information currently being updated...

Sound Insulation
Sound Qualities:
The glass bricks we stock have a rating of 39dB (decibels) up to 50dB. This means that they effectively reduce the noise by 40 to 50dB coming through the wall. This makes them ideal for night clubs, homes on busy roads or train lines, noisy neighbours or young rock stars in the making.
As an approximate guide:
190x190x80mm thick blocks - 39-40dB
190x190x80mm thick blocks BSH20 - 47dB
190x90x80mm thick blocks - 41dB
190x190x50mm thick blocks - 42dB
240x240x80mm thick blocks - 42dB
240x115x80mm thick blocks - 45dB
300x300x100mm thick blocks 35dB
190x190x100mm thick blocks - 42dB
190x190x100mm double thickness blocks - 45dB
190x190x150mm triple thickness blocks - 50dB
Double Skin wall of 190x190x100mm blocks - 50dB
This is a guide for glass brick panels when laid in mortar, silicone systems aren’t as effective at reducing sound transference through the panel although they are still pretty good (data on this not available)
If you have specific requirements and need more accurate data please make contact with us.

Solar Heat Gain Coefficient (SHGC)
Solar Gain is the increase in thermal energy of a space, object or structure as it absorbs incident solar radiation. The amount of solar gain a space experiences is a function of the total incident solar irradiance and of the ability of any intervening material to transmit or resist the radiation. (Source: Wikipedia)
Solar Heat Gain Coefficient (SHGC) is the fraction of solar radiation admitted through a window, door, or skylight -- either transmitted directly and/or absorbed, and subsequently released as heat inside a home. The lower the SHGC, the less solar heat it transmits and the greater its shading ability. (source: Energy.Gov)
Currently, there is no certified documentation on the SHGC of glass bricks/glass blocks.
SHGC is expressed as a measurement between 0 and 1.
We have been informed by glass block manufacturers and or their representatives, that the typical SHGC of 190x190x80mm thick hollow glass blocks is approximately 0.79.
We offer this information as a guide only and cannot produce documentation at this time to certify this claim. This may change soon as manufacturers begin to recognise the demand for this certification.

Light Transmission
The great thing about glass bricks is that more of the heat from the sun is reflected away with greater angles than with lesser angles while still allowing lots of light transmission.
So the higher the sun is (summer months) the less heat travels through the glass bricks, keeping the room cooler. The lower the sun is (winter months) the more heat travels through the glass bricks, warming the room.
Light transmission data is offered as an approximate guide, not to be relied upon for complete accuracy:
Colourless Blocks
190x190x80mm thick blocks - 79-81%
190x90x80mm thick blocks - 79%
240x240x80mm thick blocks - 85%
240x115x80mm thick blocks - 77%
300x300x100mm thick blocks 84%
190x190x100mm thick blocks - 80%
190x190x50mm thick blocks - 78%
Coloured Blocks
190x190x80 Grey 49%
190x190x80 Light Blue 72%
190x190x80 Light Green 69%
190x190x80 Turquoise 69%
190x190x80 Pink 71%
190x190x80 Brown 54%
190x190x80 Blue 50%
No information currently available for laminated multi-layer bricks, theoretically they will transmit less light due to extra thickness, more layers of glass and the translucent film of silicone binding the layers together.
190x190x100mm double thickness blocks - ?
190x190x150mm triple thickness blocks - ?
190x190x160mm double thickness blocks - ?

Structural Support?
There can be substantial weight in a glass brick wall, especially if it is installed with mortar. Although we are not experts in structural engineering, we can provide you with some helpful estimations of the weight of different sized glass block panels that may be useful in designing the support required to hold up the panel successfully. For information on the weight of individual glass block units, please refer to Section - What Do Glass Bricks Weigh?
Disclaimer: we offer this information as an unofficial estimate of weight involved and bear no responsibility for the accuracy of the information. We highly recommend you consult with your structural engineer to verify the weight involved and to properly design the support required accordingly.
We have downloadable weight charts here for different panels sizes for various glass brick sizes and types.
We are just starting to provide these charts as we compile the information required, we will add more as we complete them. Check back in soon if what you need isn’t here, or give us a call.
Weight Chart for Glass Brick Panels in Mortar using 115x115x80 Hollow Glass Bricks
Weight Chart for Glass Brick Panels in Mortar using 145x145x80 Hollow Glass Bricks
Weight Chart for Glass Brick Panels in Mortar using 190x90x80 Hollow Glass Bricks
Weight Chart for Glass Brick Panels in Mortar using 190x190x80 Hollow Glass Bricks
Weight Chart for Glass Brick Panels in Mortar using 190x190x100 Hollow Glass Bricks
Weight Chart for Glass Brick Panels in Mortar using 190x190x100 TF30 Hollow Glass Bricks
Weight Chart for Glass Brick Panels in Mortar using 190x190x150 TF60 Hollow Glass Bricks
Weight Chart for Glass Brick Panels in Mortar using 190x190x160 60F Hollow Glass Bricks
Weight Chart for Glass Brick Panels in Mortar using 190x190x160 90F Hollow Glass Bricks
Weight Chart for Glass Brick Panels in Mortar using 240x115x80 Hollow Glass Bricks
Weight Chart for Glass Brick Panels in Mortar using 240x240x80 Hollow Glass Bricks
Weight Chart for Glass Brick Panels in Mortar using 300x300x100 Hollow Glass Bricks
Weight Chart for Glass Brick Panels in Mortar using 230x76x110 Solid Glass Bricks (3 pages)